Create your contributor profile

TRR379 contributor profiles are automatically updated on the main website based on the knowledge pool. Follow these steps to create and/or edit your own profile, including uploading a portrait photo.

  1. Navigate to the knowledge pooling tool.

  2. Log in using your associated TRR379 hub account.
    • Click the “Login” (human silhouette) button.
    • Select the “Login with TRR379 hub” option.
    • Read the disclaimer, and if you agree, select “Authorize Application”.
    • A checkmark will appear on to the “Login” (human silhouette) button if you were successfully logged in.
  3. Select the “Person” Data Type on the left side of the page.

  4. Create a new record by clicking the + (plus) button, or edit an existing record by clicking the pencil icon.
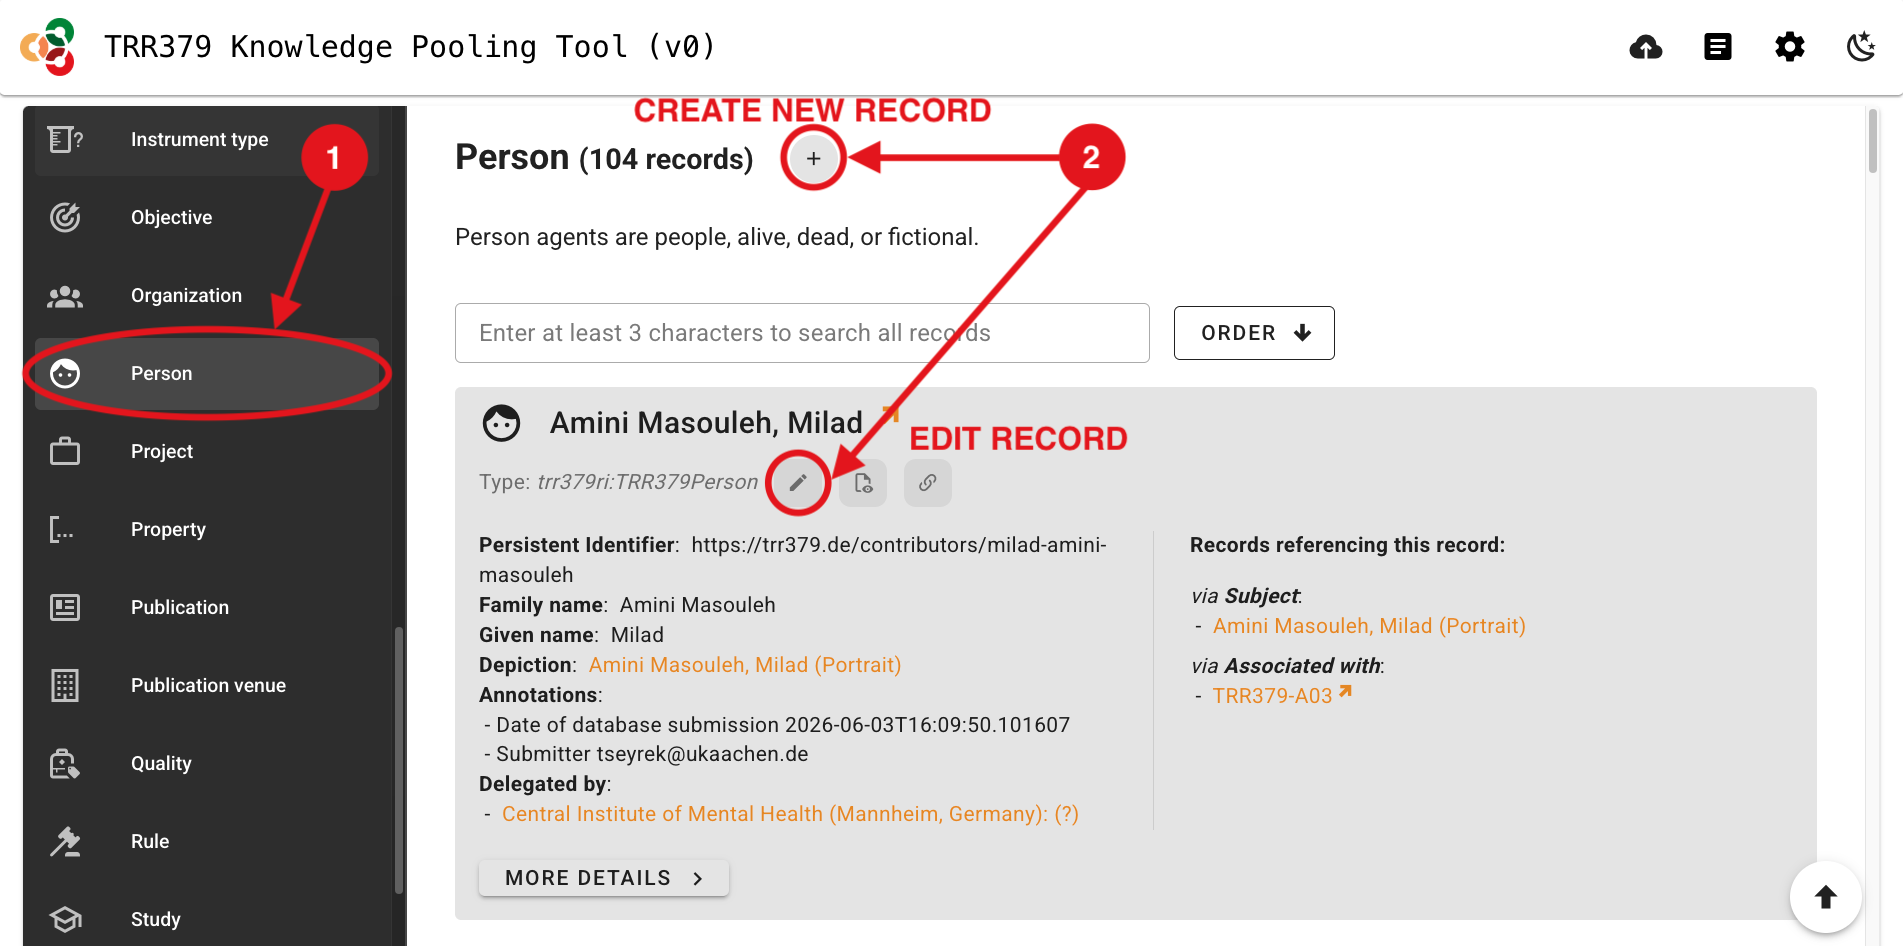
Screenshot showing the add- and edit-buttons for a person record Screenshot showing the add- and edit-buttons for a person record

  1. To add a portrait photo, click the “Upload a depiction” Wizard button (person silhouette icon). Click the file attachment button (paperclip icon), and select the portrait image with your file browser. Wait for the green checkmark confirmation of a successful upload, and then click “SAVE”.
Important

Image requirements:

  • Contributor portraits: maximum 400 pixels wide
  • Page thumbnails: minimum 320 by 240 pixels, aspect ratio 4:3
  • A single image can serve as both portrait and thumbnail if the face is centered
  1. Proceed to add relevant information to complete your contributor profile as follows:
ORCID identifier
  • Within the “Identifiers” box, select “ADD NEW ITEM” and then “ORCID” from the dropdown menu.
  • Under “Notation”, enter your ORCID in the format “XXXX-XXXX-XXXX-XXXX”.
  • Under “Creator”, start typing “ORCID” and select the “ORCID” organization when it appears in the dropdown menu.
  • Click “SAVE” in the top-right corner to save the ORCID record.
Description
  • Within the “Description” box, type a short biography, which can include (but is not limited to) information such as your affiliation(s), professional expertise/interests, and your role within TRR379.
  • The “Description” field supports Markdown formatting. To preview how your description will render, select the small Markdown logo (capital “M” with a downward-facing arrow) to enter the Markdown editor.
Name(s)
  • Enter the relevant family name(s), given name(s), honorifics, etc. in the respective text boxes.
Affiliation(s)
  • Within the “Delegated by” box, select “Organization” from the dropdown menu.
  • A new box will appear just below “Organization”. Search for your affiliated organization by starting to type its name, and select the appropriate organization when it appears in the dropdown menu.
    • TIP: Organizations might exist in the pool in a language different to what you are searching for, or might not be searchable based on their abbreviations. Try searching keywords in the organization name that do not translate in different languages before adding a new organization. For example, you may want to search “Jülich” instead of “Research Centre Jülich”, “Forschungszentrum Jülich”, or “FZJ”.
  • To add additional affiliations, select the + (plus) button to the right of the “Delegated by” boxes.
  1. Once all relevant information has been entered, click “SAVE” in the top-right corner to save the Person record.
  2. Click the “Submit” button (cloud icon, top-right), which should show a green notification dot to indicate changes are ready to be submitted.
Important note about saving versus submitting

The pool has two separate actions: saving and submitting. Saving stores your work in the browser only! It does not submit the record to the server for use by the consortium workflows. To submit, click the Submit button (cloud icon, top-right corner) when there is a green notification dot indicating records are ready for submission. Do not close your browser tab before submitting, or your data will be lost.

  1. The interface will list all records you are about to submit. For a contributor profile with a profile photo, you should see three records: a File, a Depiction, and a Person.
  2. Click “Submit”. A confirmation message will appear when submission is successful. If an error occurs, note the message and retry. If it persists, you may wish to review common error messages or reach out for help via the resources on the Support page.
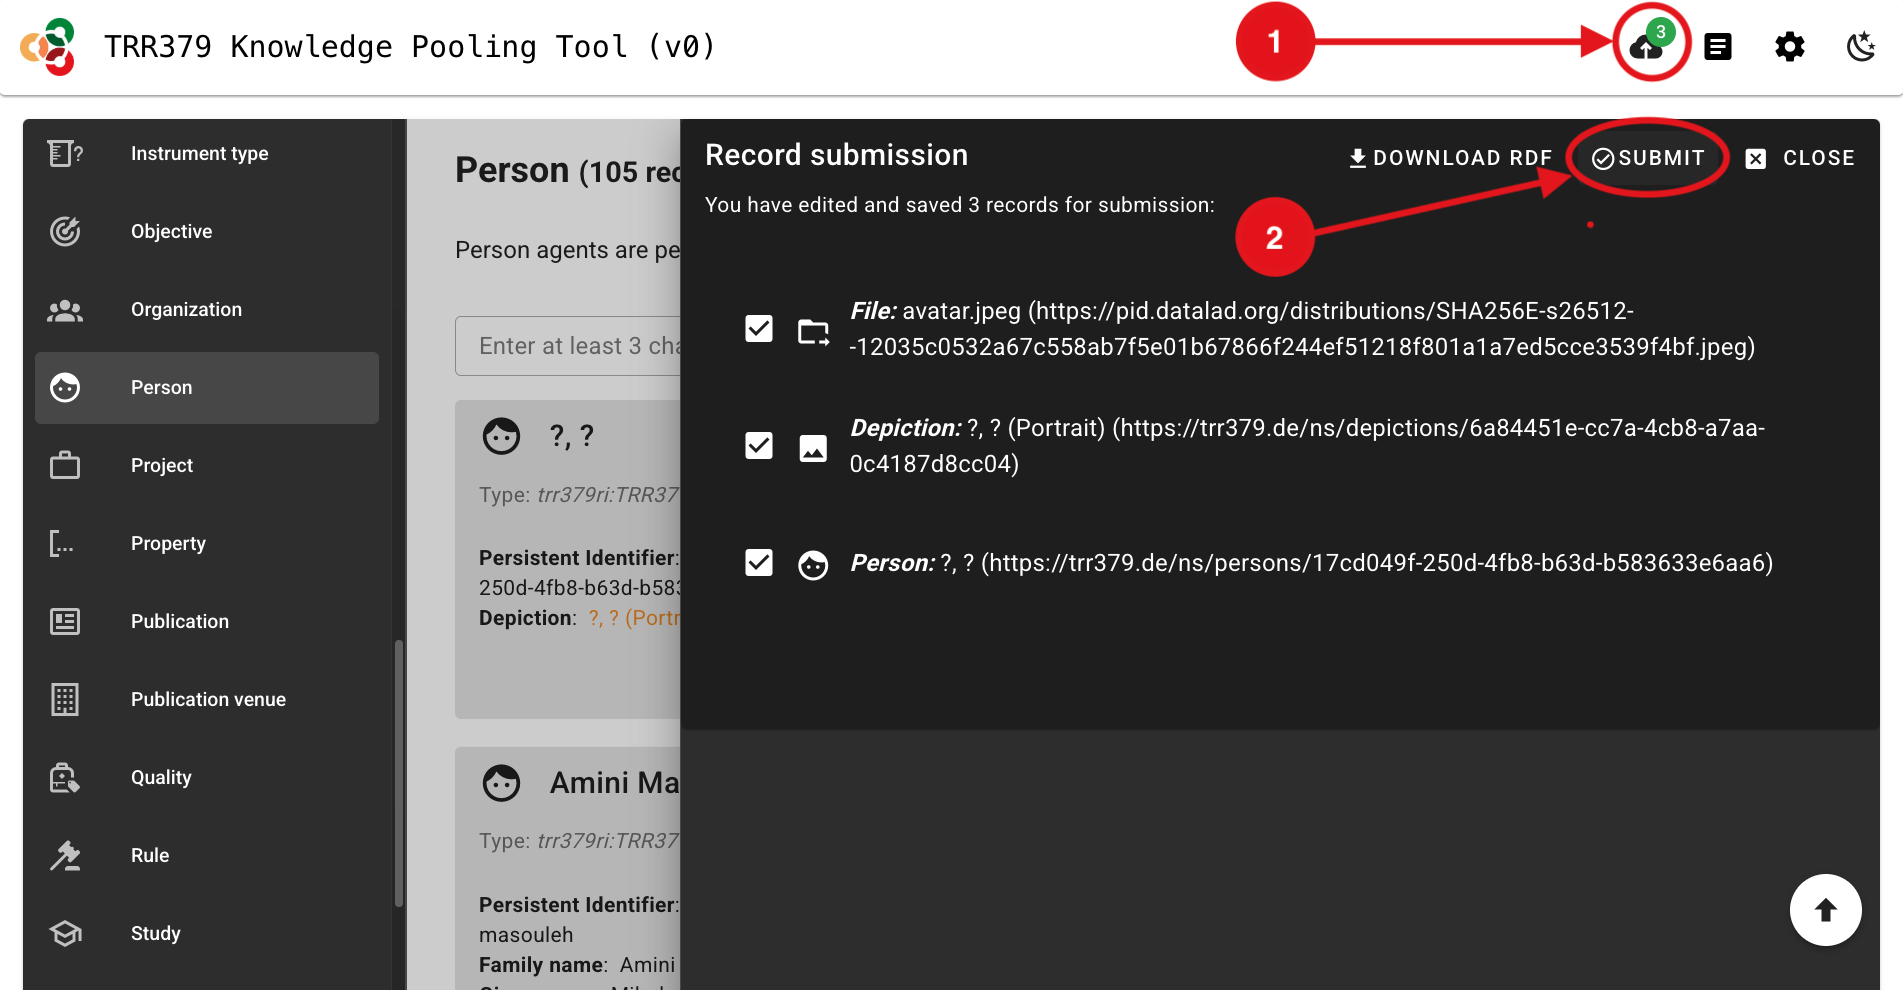
Screenshot showing the form submit button with a summary of the saved and to-be submitted records. Screenshot showing the form submit button with a summary of the saved and to-be submitted records.